Switching from shared hosting to a virtual private server (VPS) is a relatively easy move. However, learning how to set up a VPS can be a little more complicated, especially if you’ve never used a command line before.
In this article, we will then see how to set up a VPS in five steps:
- Find out how to log into your VPS via Secure Shell (SSH) login.
- Updating your server.
- Creating a new user and changing his privileges.
- Enabling public key authentication.
- Configure a firewall for your VPS.
Before we get into the technical details, however, we will explain why you will need to set up your new virtual server. Let’s talk about how to set up a VPS!
Why you should set up your new VPS
Usually, when you sign up for a basic hosting plan, your provider will set up all the software you’ll need to use it. With shared hosting, for example, you’ll likely have access to a control panel for your account right away.
These hosting control panels provide you with all the options you need to set up your account. However, in most cases, you will not be able to change the actual settings of your server, because other people are also using the same machine.
With a VPS, on the other hand, you get a server environment all to yourself . In most cases, your host will go so far as to configure basic server software, such as Apache or Nginx, and the rest is up to you. This means that you will likely need to take a few additional steps to prepare your server, for example:
- Decide when to start using VPS.
- Learn to connect to it and issue commands.
- Understand how to install new software and perform updates.
- Set up new user accounts (if needed).
- Setting up a firewall.
Usually, you will interact with your VPS using a command line instead of a graphical user interface (GUI). It can be intimidating at first, but you’ll quickly get used to it if you don’t mind Googleing for the right commands and following a few simple tutorials.
You can also set up hosting control panels that will allow you to interact with your server using a GUI.
5 steps to set up your new VPS
As you may know, the vast majority of web servers run on Unix-based systems. This means that you will need to use commands tailored to thatSet featured image type of operating system (OS), which are not the same as you would use on a Windows machine.
That said, let’s talk about how to set up a VPS!
Step 1: log into the VPS via Secure Shell (SSH) login
There are several ways to connect to a website besides using a browser. For example, you can use File Transfer Protocol (FTP), which allows you to upload, download and edit files on your server:
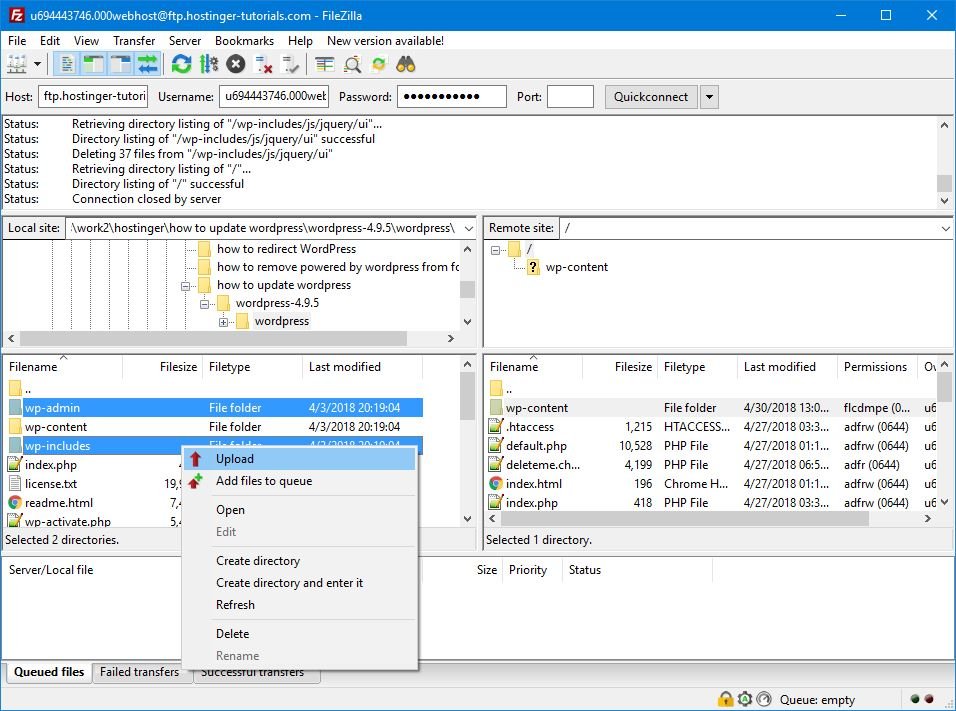
While FTP can be very useful, the protocol does not allow you to send commands to your server. For this, you will need to use Secure Shell (SSH) access, which is a different type of protocol that provides you with access to remote servers.
Once you connect to a server via SSH, you will be able to send commands to it. SSH is also known for its strong encryption and authentication protocols, which make it highly secure. By learning how to use SSH, you will take your first steps in server management.
Once you’ve signed up for a VPS plan, your web host should provide you with a number of credentials, including:
- The IP address of your server
- A username (usually root)
- A password for your root account
In case you are unfamiliar with the term, a root (or superuser) account is a user with full privileges and access on a specific system. You can think of it as the equivalent of an administrator, but with even more power.
When setting up a VPS, you will start with a single root account, which is what you will use to make the initial connection. If you are using a Unix-based operating system, you can connect to your server directly from the command line.
For this tutorial, we will be using PuTTY in our examples.
You will then see a window like this:
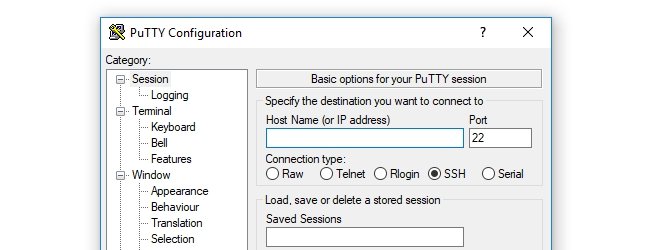
At this point, you need to enter your server’s IP address in the Hostname (or IP address) field and leave the Port setting at the default value of 22:
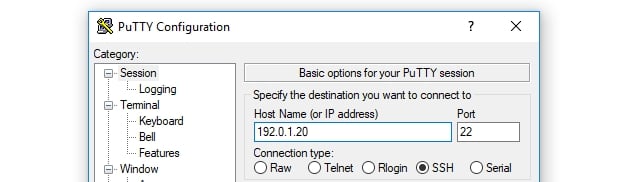
You may notice that there is an option to select the type of connection you want to use under the IP field. Choose SSH, then you can go ahead and hit the Open button .
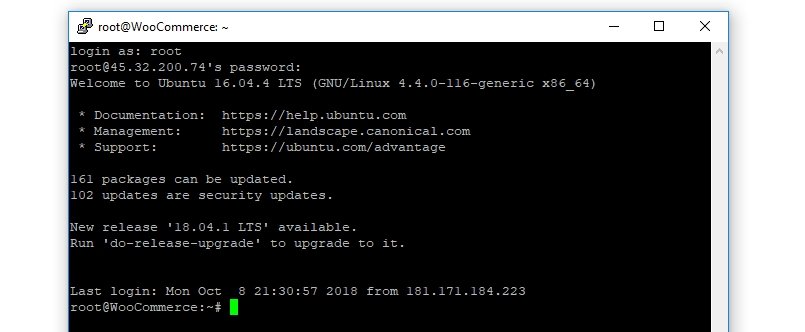
A command line window will open to you now and you will see a prompt to enter your login information. In this case, it will be root and its corresponding password:

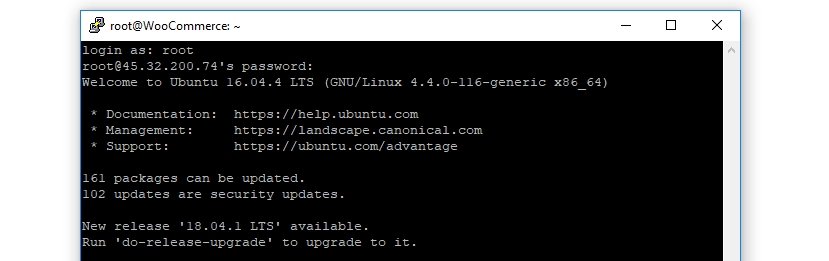
If the data entered is correct, you will see a brief summary of your server details and a request to enter more commands:
Don’t close the command line window yet, as we still have some work to do.
Step 2: update your server
Once logged into your VPS, you will see a message telling you if there are any “packages” or security updates available:
Packages are essentially Unix language software. When it comes to any system, it is always important to keep its components up to date and servers are no exception.
If you’re using outdated software, you open your server (and website) to security vulnerabilities. Additionally, you may miss out on new features or improved performance. That’s why the first thing you’ll want to do is update your server’s packages and download any pending security patches.
To get started, type the apt update command and hit Enter . Now your server will double check which packages need to be updated. Once done, enter apt upgrade , which will upgrade your server’s packages.
This process may take some time, depending on the number of updates required for the server installation.
Once all your packages are up to date, you should go ahead and reboot your server using the reboot command. Then, close the command line window. Wait a minute or two and log in again.
If all went according to plan, no other available updates should be listed. This means that we can move on to the next stage of learning the configuration of a VPS.
Step 3: Create a new user and change their privileges
When setting up a VPS, you start with a root user, which is the account you have used so far. However, it’s usually a good idea to set up another user account with superuser privileges.
The reason for this is that the root account can cause severe damage if you are not sure what you are doing. A root account has full access to all settings on your system, so one wrong command can create serious problems.
A normal user account with superuser privileges, on the other hand, must add the prefix sudo to any command it wishes to execute using administrator privileges. This may seem like a small change, but it makes a huge difference. With this approach, you’ll have to think twice before running any commands using the sudo prefix, which can help you avoid crashes.
Go ahead and set up that new user right away by entering the following command. We recommend replacing the second part with the username you want to use:
adduser yournewusername
Then, type this line to add that user to the sudo group, which will give them superuser privileges (again, replacing the placeholder with your new username):
# usermod -aG sudo yournewusername
Step 4: Enable Public Key Authentication
Public key authentication is probably a more secure technique than regular passwords. With this approach, you generate a set of both “public” and “private” keys.
Your server will store your public key and use it to authenticate your private key, which only you will have access to as a file on your computer. After setting up public key authentication, you will need both the private key and a passphrase to log in, which significantly increases security.
To generate SSH keys in Windows, you can use the PuTTYgen app, which will have been installed when you configured the client earlier. Search your programs and now run the PuTTYgen app, which should look like this:
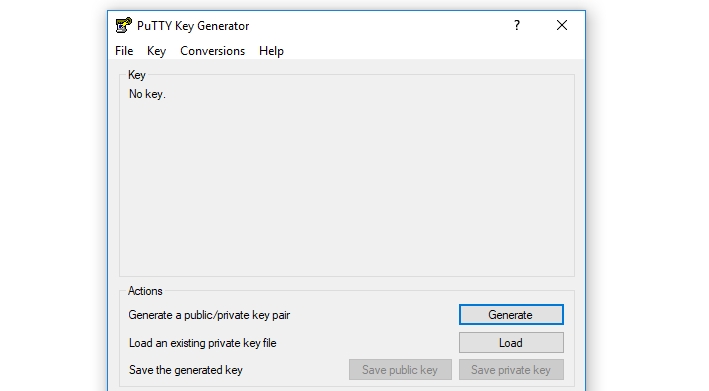
It’s okay to use the default settings for the key pair, so go ahead and click the Generate Now button . To make your key more unique, the program will ask you to move the mouse to randomize it.
Next, the program will show you the public key it generated for you. Before you do anything else, go ahead and set up an accompanying passphrase, which will act as the password along with the key.
Now go ahead and hit the Save Private Key button and save the resulting file to your computer. You’ll also need to copy your public key in a moment, so don’t close this window yet.
Then, log back into your server using the original root user and change to your new account’s home directory using # su – yournewusername . The command line will now reflect your new user:

Next, you’ll need to run a series of commands in order, which will create a new folder for your public key, restrict that folder’s permissions, and save your key:
mkdir ~ / .ssh

chmod 700 ~ / .ssh

nano ~ / .ssh / authorized_keys
This last command will open the Nano editor, allowing you to edit the new authorized_keys file on your server. Go ahead and copy your public key now from the PuTTYgen window and paste it here.
Once the key is ready, press CTRL + X to close the editor and enter Y when it asks you to confirm the changes to the file. Then, type the following two commands:
chmod 600 ~ / .ssh / authorized_keys

exit
These will change the permissions for the file you just edited and then return to the root user.
Next, you will need to configure PuTTY to use your private key when you connect to your server so that it can recognize you. To do this, go back to the main screen of the app and go to the Connection ›SSH› Auth section. Inside you will find a field called Private key file for authentication.
Click the Browse button, then locate the private key file stored on your computer. Select it and you are good to go.
Finally, you need to tell your server to disable the default password-only authentication method for the new user you just set up. To do this, log into your server as a new user via SSH and run this command:
sudo nano / etc / ssh / sshd_config
This will open the s shd_config file using the Nano editor. Look for the line that reads PasswordAuthentication within that file and delete the # sign before it. Then change its value from Yes to No, so it reads like this:
PasswordAuthentication no
Save the changes to the file and restart the server. The next time you try to log in, you will only be able to log in using your private key and passphrase.
Step 5: Set up a firewall for your VPS
So far we have talked a lot about how to set up a VPS. However, there is still one last step to take if you want to keep your server secure. That is, enable a firewall for this.
Conclusion
By setting up a VPS you will have much more space and functionality, but you will have to find your balance before you can start enjoying yourself. Now that you know how to set up your VPS, you are familiar with the command line, which will make it much easier to set everything up to your liking.
Source: hostinger.com

Free 30-days trial Hosting Fast, Secure and Optimized
Switch to Bhoost with 30 days free and migration included
Free 30-days trial