In this guide, you will find all the instructions that will explain what you need to consider before installing Shopware 6 and will guide you through the installation process.
Before installation
Before installing Shopware, you should pay attention to some requirements. Let’s see together what they are.
You can typically run Shopware on a self-hosted server.
Htaccess adjustments
The htaccess file is a configuration file of your web server. Among other things, it specifies which users have access to the shared files and folders. With an htaccess file, you have the option to allow access to your store only to selected users.
During installation, you should do without htaccess protection or use the following solution.
AuthType Basic
AuthName "Please login."
AuthUserFile /path/to/.htpasswd

<RequireAny>
    Require expr %{THE_REQUEST} =~ m#.*?\s+\/api.*?#
    Require valid-user
</RequireAny>
System requirements
Before installation, make sure your system meets the system requirements for Shopware 6.
If you are unsure of any of the requirements, we recommend that you consult the server hoster to make sure these requirements are met.
Routing Setting
Also, I recommend that you change the web server’s routing settings if necessary.
A corresponding Apache-based example is shown below.
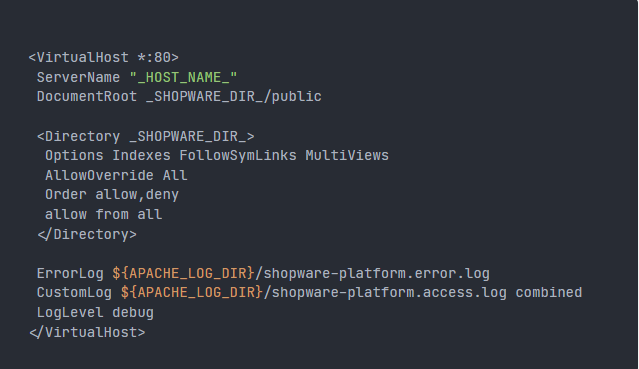
Remember to replace _SHOPWARE_DIR and _HOST_NAME_ with your settings.
You will also notice that the document root directory points to the / public folder in the Shopware 6 installation directory.
A reverse proxy sits in front of the front-end and admin interface, eliminating the need to include the public directory in the URL when accessing it through your browser.
Shopware Download
After making sure that the system requirements for Shopware 6 are met and that your web server’s routing settings are configured correctly, you can download the Shopware 6 installer and unzip it to the desired directory on your system. Also, make sure that the unzipped files and directories have write permissions.
Run the installer
After downloading Shopware, all you have to do is extract it to the desired directory on your system. Make sure the unzipped files and directories have write access.
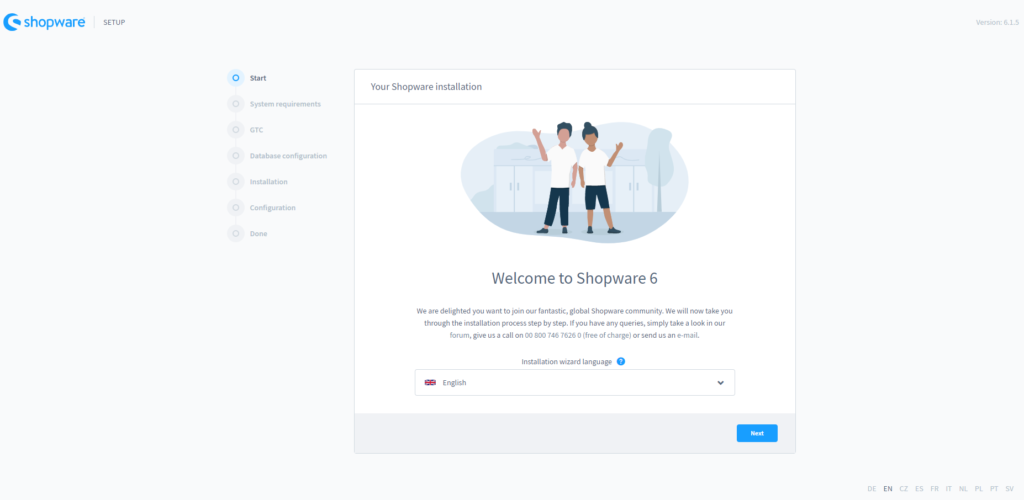
Simply visit your store URL to launch the Shopware 6 installer, which will guide you through the installation process step by step.
You can also change the language of the installer. The language can also be changed at any time by using the country abbreviations in the lower right corner of the screen.
By clicking on Next you can continue the installation.
Check the system requirements
During the second phase of installation, the system checks its requirements against your system. Arrow buttons list the requirements, while a folded menu reveals unmet requirements or areas for optimization.
General terms and conditions
In the next step, you can read the license under which Shopware is licensed. To continue the installation, you must accept the license terms.
Database configuration
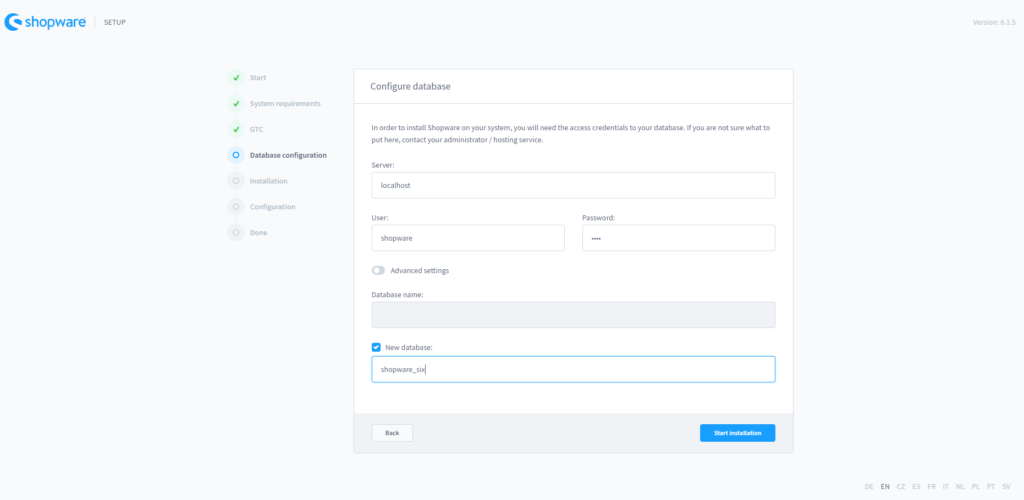
After acceptance of the Shopware license, the login credentials to the Shopware database are entered. You can create an empty database for installation in advance, or the installer can create one for you.
- To create a new database you need to check the New database box and enter a name for the database.
If one or more databases already exist, they will be listed in the Database Name field after entering the user and password. - Select the database intended for Shopware.
Please note that existing databases must be empty to import the tables needed for Shopware.
If you see advanced settings, you can also specify the database port and (optional) a socket.
Database import
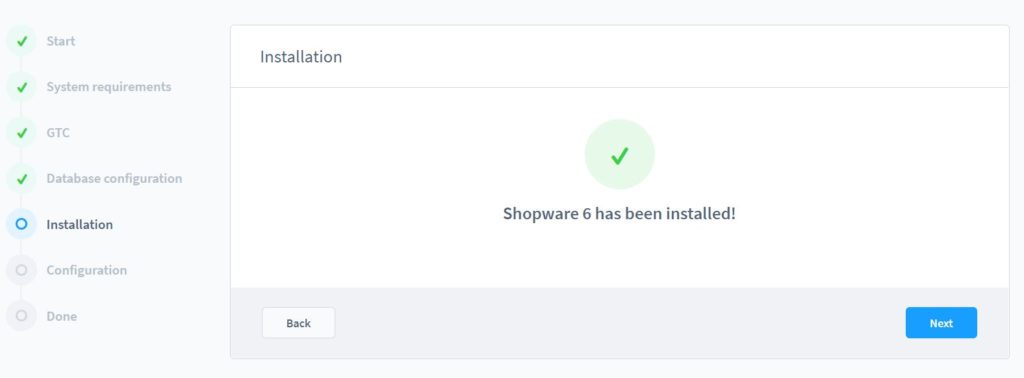
In this step, the Shopware database is imported. Click Start Installation to start importing the database.
The installation wizard will inform you that the installation is complete. Click Next to proceed with the configuration.
Configuration
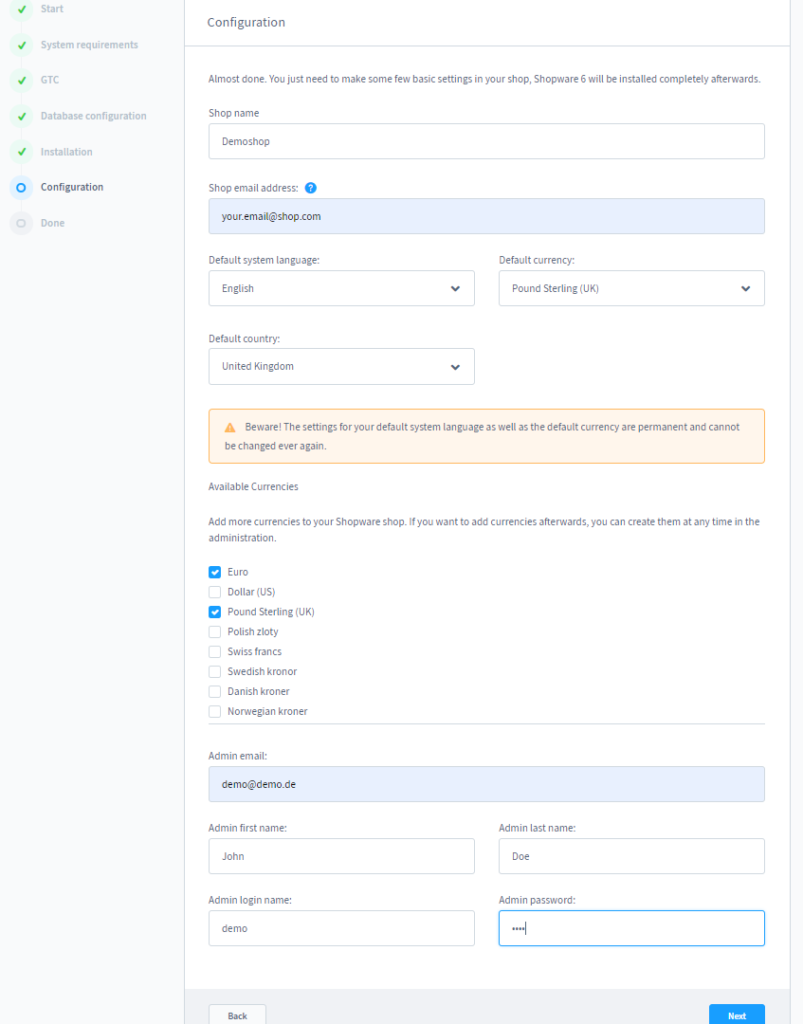
In the last step, you specify the basic settings for your shop:
- The store email address will later be the global email address from which all emails are sent.
- The default system language specifies which language this installation will use as the default. This affects both the front end and the admin area.
- You have the following predefined currencies to choose from: Euros, British Pounds, US Dollars, Polish Zloty, Swiss Francs, Swedish Kroner, Danish Kroner, Norwegian Krone, and Czech Koruna. The currency you choose here will be entered by default in the shop with the currency factor 1. You can add multiple currencies directly or add multiple currencies with the corresponding conversion factors later.
- The area starting from the admin email address field defines the admin user for the Shopware 6 admin interface. Enter your relevant data here. If needed, you can create and manage additional users in the administration interface after installation.
Note that the default language and currency cannot be changed later.
Conclusion
The installation is now complete and the installer will automatically redirect you to the admin interface. To log in use the admin user you just created to set up your Shopware 6 store.
Source: Shopware Guide
That’s it, folks! Check out our blog for more information.

Free 30-days trial Hosting shopware Fast, Secure and Optimized
Switch to Bhoost with 30 days free and migration included
Free 30-days trial