This guide gives you full control over the process. PrestaShop has supported this feature for several major versions, making it applicable to very old stores.
Download release
The first step is to download the latest version at https://www.prestashop.com/.
You can also download PrestaShop from the command line:
wget -O prestashop-upgrade.zip https://www.prestashop.com/download/old/prestashop_1.7.7.5.zip
Once you have the folders like classes /, modules /, themes / , etc. you can go to the next step.
Simple Data Cleanup
Avoid overwriting production resources (images, conf…) with default data. These folders can be removed from the new version:
- img /
- override /
All other files in the new version will overwrite the existing files. Making any changes to the source code will result in lost changes.
Also, rename the “admin” folder to match your store’s admin folder name. This will prevent unwanted duplication of the administration content.
Activation of maintenance mode
As it may cause unexpected behaviour for you and your customers during the upgrade, we strongly recommend that you turn on maintenance mode during the upgrade.
You can do this in your admin panel:
- On PrestaShop 1.7, in Store parameters> General> Maintenance tab
- On PrestaShop 1.6, in Shop parameters> Maintenance
Adding your IP address will allow you to access your store while it is in maintenance mode. This way, you can make sure everything is working properly before allowing your customers to access it again.
Copy the files
In this step, we “update” the PrestaShop files by copying the content of the new version to the existing store.
Disable the cache
You may have activated a caching system (e.g. memcache) on your store. If so, be sure to disable it in “ Advanced Settings” > “Performance”. Once the update process finishes, you can re-enable it.
Note on the “Vendor” folder: the previous updates of PrestaShop 1.7 showed that conflicts can occur when merging the new supplier/folder with the old one. Deleting this folder in your existing store before copying the new one will prevent this problem.
On Windows, copy the new contents of the folder and paste it into your store folder. You will receive warnings that the files already exist in the destination folder. Choose “overwrite” to continue.
On Linux, the copy can be done in your terminal:
cp -R <path_to_the_new_release>/* <path_to_the_current_shop>/
For example:
cp -R ~/Downloads/prestashop/* /var/www/html/
Database update
Once the files have been copied, your store database is ready to be updated.
The installation folder contains all the changes to be applied. You can execute them using a specific PHP script.
When ready, run the install / upgrade / upgrade.php file.
This can be done with a browser, by reaching the address http: // <shop_domain> /install/upgrade/upgrade.php or from the command line of your server:
php install/upgrade/upgrade.php
In both cases, an XML log will be displayed. The result can be found in the result of the attribute of the first <action> tag:
- ok if updates have been found and performed
- error if something went wrong
- info for subsequent actions, viewing process details
Execution log
When the update script detects updates to apply, it will list the executed SQL queries along with their results.
<?xml version="1.0" encoding="UTF-8"?><action result="ok" id="">
<action result="info" id="1.7.0.5"><![CDATA[[OK] PHP 1.7.0.5 : /* PHP:ps_update_tabs(); */]]></action>
<action result="info" id="1.7.0.5"><![CDATA[[OK] SQL 1.7.0.5 : ALTER TABLE `ps_currency` MODIFY `name` varchar(64) NOT NULL]]></action>
<action result="info" id="1.7.1.0"><![CDATA[[OK] SQL 1.7.1.0 : SET SESSION sql_mode = '']]></action>
<action result="info" id="1.7.1.0"><![CDATA[[OK] SQL 1.7.1.0 : SET NAMES 'utf8']]></action>
[...]
You can double-check that each action is marked “OK”. If not, further details will be shown after the request, which can help you resolve the issue and re-run the request manually on your database. In some cases, you may need to restore the database backup and start over.
Error codes
You can also see an error code. Each code is related to a message described here:
- Error n. 27: The store is running a newer version than the content provided by the installation folder.
- Error n. 28: The store is already at the version you are trying to upgrade to.
- Error # 29: The current version could not be found. Check the database parameter file and database connection.
- Error n. 31: unable to find upgrade directory in installation path, install / upgrade / sql folder exists and is not empty?
- Error # 32: No updates need to be applied.
- Error # 33: Error loading an SQL update file. Check the permissions of the install / upgrade / sql folder.
- Error # 40: The version provided in the install / install_version.php file is not valid.
- Error # 43: Error updating database schema using doctrine.
- Error # 44: Error updating translations.
- Error # 45: error while enabling the theme.
Cleaning
Before we go any further, we will have to do some cleaning.
You can now safely delete the installation folder, as it’s no longer needed for database updates. When you open your store (in the front or back office) on your browser, you may experience some visual problems. Your browser might be serving cached resources, causing these visual problems. Reload them by forcibly refreshing the page (press ctrl + R on Windows / Linux or cmd + R on Mac OS) or by clearing your browser cache.
Update the modules
The update process updated your module files, but some may still require additional database changes. Check the module page in your Back Office to see if updates are pending.
Go to your admin panel and log in. You will notice that the version displayed has changed on the login page. Then, in the menu, click on the form page to reach your catalogue.
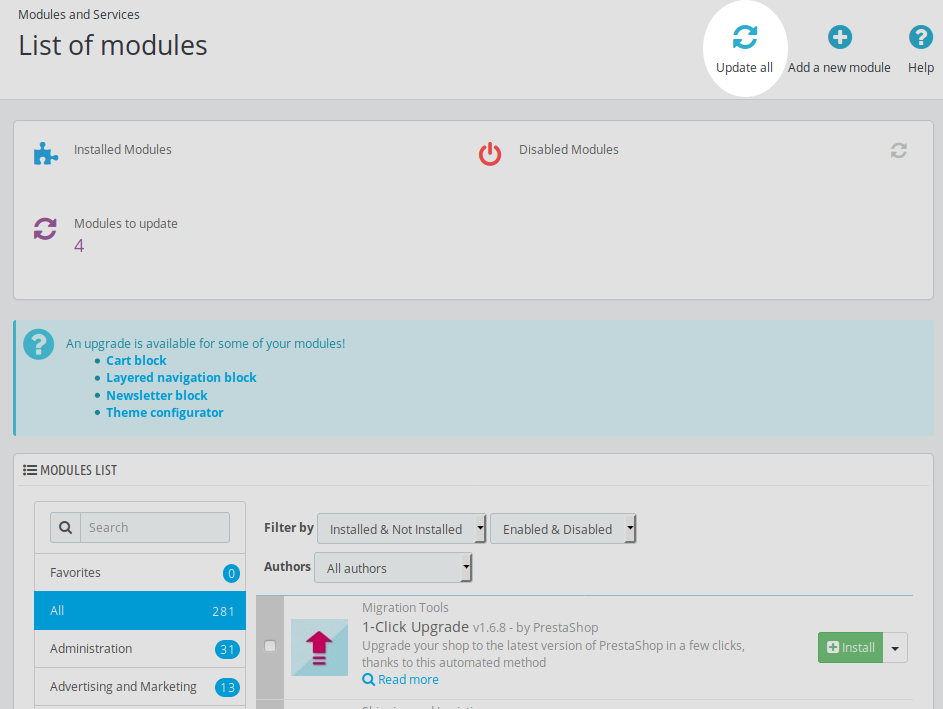
On PrestaShop 1.6, this page is located in “Module and services”. Click “Update All” at the top of the page to perform all available updates:
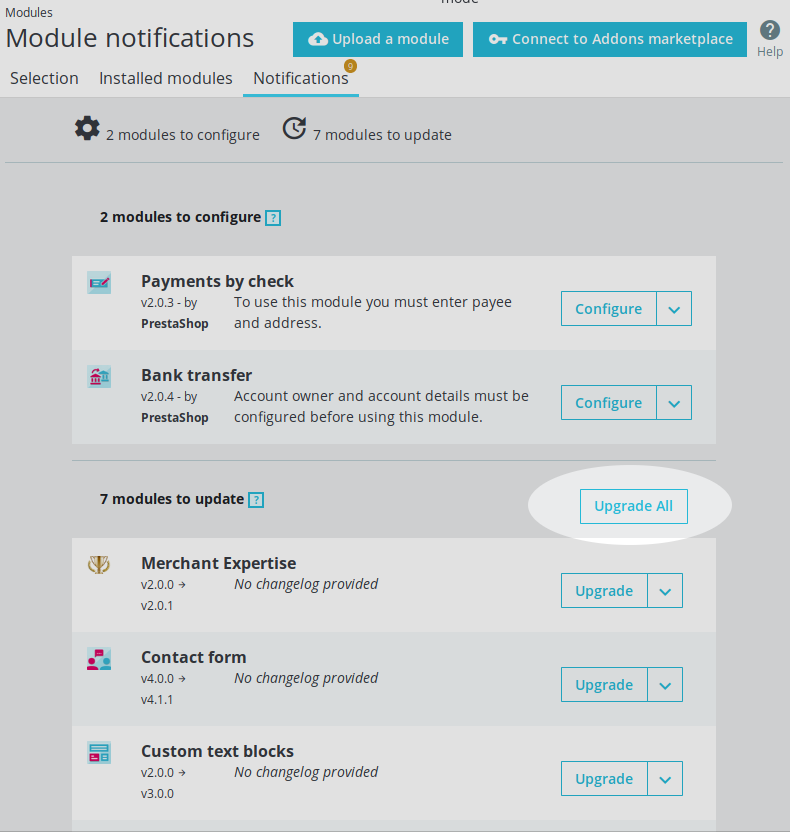
On PrestaShop 1.7, the same functionality can be found on the Enhance >> Modules page, in the “Notifications” tab:
1-click update module
If the manual process seems too tedious, there are other solutions to complete an update.
PrestaShop provides a free 1-click upgrade module on the marketplace and admin panel of your store. It automatically carries out the previously mentioned process. In addition, it is available for almost all versions of PrestaShop.
You can read more about it here.
That’s it, folks! Check out our blog for more information.